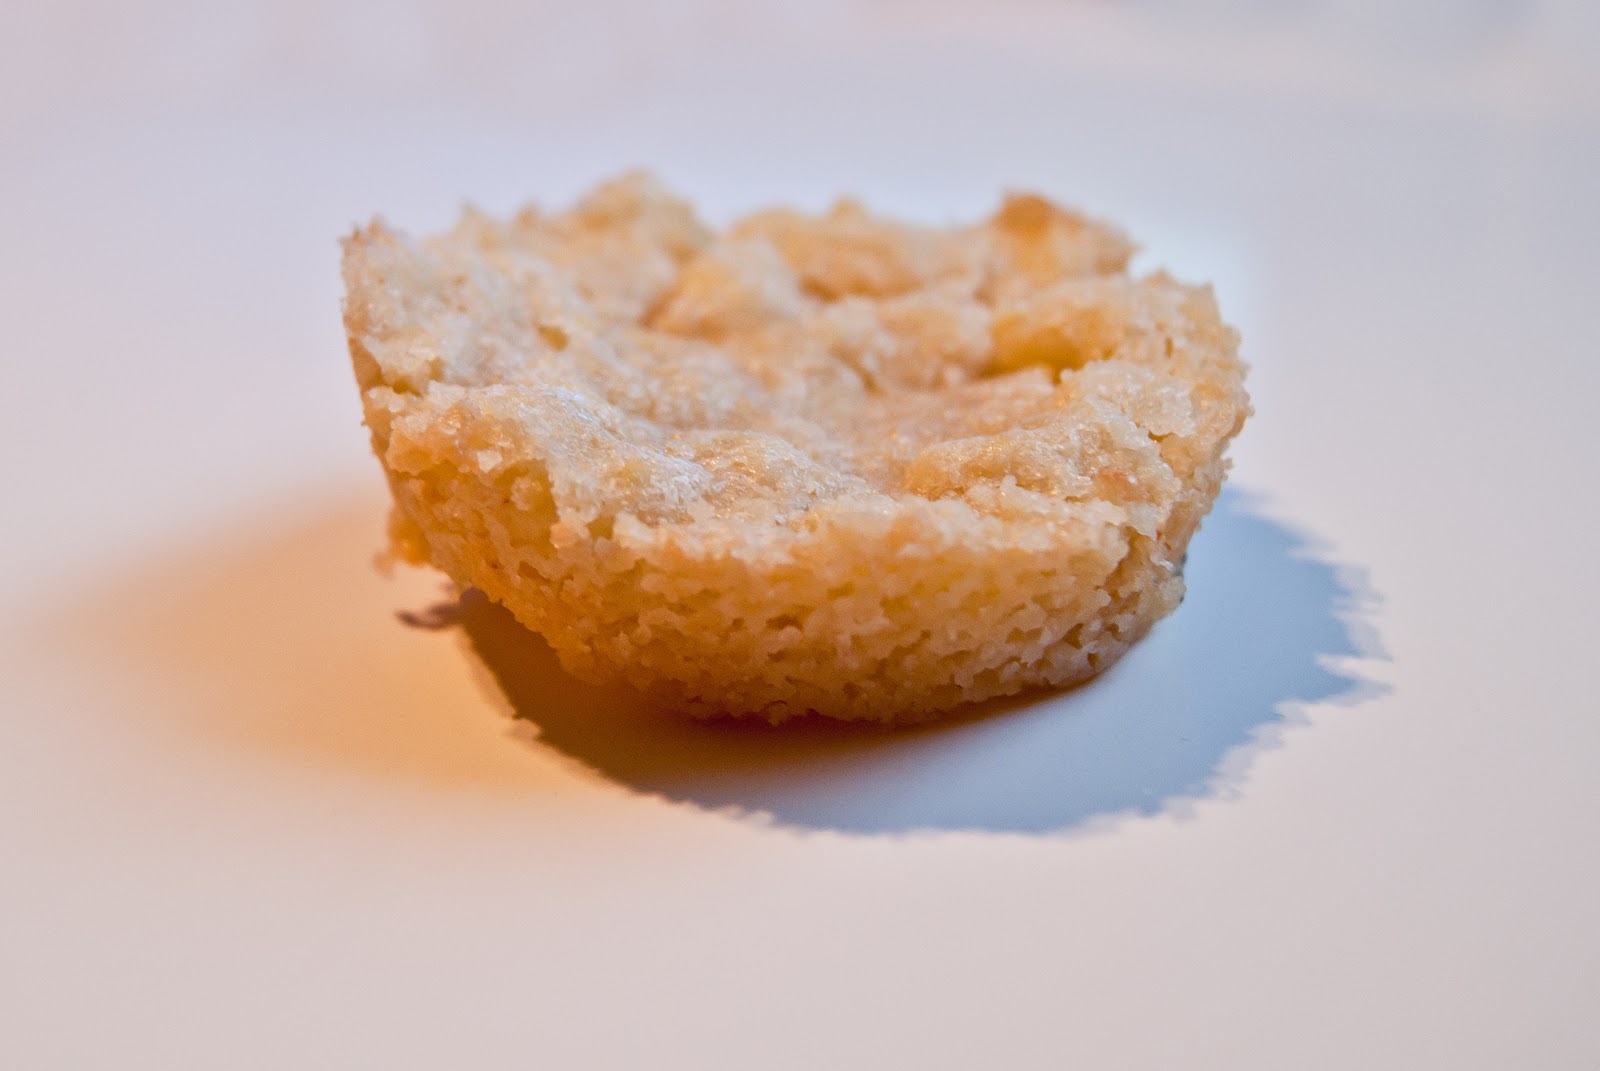
Vanilla Ice Cream with Marshmallows (c. 1931) ★★★★★


Today I have a menu for "Christmas Dinner," taken from The Settlement Cookbook. This cookbook was originally published in 1901 and was so successful that a further 34 editions were published. Today's excerpt comes from the edition published around 1931, which seems to be one of the more popular editions. In this edition the author, Lizzie Black Kander, includes several menu suggestions, including ones for holidays such as Christmas, St. Patrick's Day, Valentine's Day, Lent, and Washington's Birthday. Since making the whole Christmas menu would be a little...overwhelming, I chose to make just one dish, marshmallow ice cream. The menu didn't indicate a specific flavour, but the book gives a few varieties, including chocolate, coffee, orange, and New York.
What caught my attention while reading this cookbook was that it was written by a Jewish woman who wanted to assimilate young Jewish girls into mainstream American society. One might see Kander's fight for Americanization of immigrants as a negative thing - after all, she was encouraging the abandonment of traditional culinary values. However, it would be difficult not to describe Kander as a strong, courageous woman who actively sought out her goals (despite the fact that she proclaimed the importance of the woman in the domestic sphere).
The focus of the cookbook explains the emphasis on American holidays in the menus section. However, I did notice a few traditional Jewish recipes throughout the book, such as matzo balls, matzo pudding, and kugel. There are also a number of German and Eastern European influences present - in fact, the book is one of the largest collections of Jewish and German recipes published in the United States.
The Settlement Cookbook was also a charity cookbook - its aim was to raise funds for the Jewish Settlement House in Milwaukee, Wisconsin ("settlement work" was a term used to describe charitable work among immigrants). The success of the book meant that charities in Milwaukee benefited from the book's sales for over 75 years.
Overall, Kander's work was extremely influential in Milwaukee and the United States as a piece of socio-cultural history. Indeed, it is still influencing North American society today, in facsimile and new revised editions.

Original Recipe:


The Verdict:
This ice cream is ridiculously creamy. I was shocked at how silky it was on my tongue. I liked the flavour, but I think I might have preferred the chocolate variety a little more. Mr. Man thought it was cream cheese at first. He didn't like it, but that's because he doesn't like marshmallows.
I also happened to accidentally burn a little bit of the mixture while it was on the stove, but it actually gave a nice toasted marshmallow flavour. Really, this recipe is nice the way it is, but next time I would toast the marshmallows beforehand.

Modernized Recipe:
(Adapted from The Way to A Man's Heart ... The Settlement Cook Book)

1 cup MILK
20 MARSHMALLOWS
1 cup CREAM or EVAPORATED MILK
1 teaspoon VANILLA

1. In a medium saucepan, heat the milk. Cut the marshmallows into small pieces and add to the hot milk, stirring until dissolved.
2. To the saucepan, add the vanilla. Let cool.
3. Whip the cream until stiff peaks form. Gently fold into the cooled marshmallow mixture.
4. Put the ice cream mixture into the freezer to set or follow the directions on your ice cream maker.

-----
Sources

Fritz, Angela. "Lizzie Black Kander and Culinary Reform in Milwaukee, 1880 - 1920."Wisconsin Magazine of History 87.3 (2004): 36-49. Wisconsin Historical Society. 2007. Web. 20 Dec. 2012. <http://content.wisconsinhistory.org/cdm/compoundobject/collection/wmh/id/42933/show/42910>.

"Lizzie Black Kander." Wikipedia. Wikimedia Foundation, 12 May 2012. Web. 20 Dec. 2012. <http://en.wikipedia.org/wiki/Lizzie_Black_Kander>.

"The Settlement Cook Book." Feeding America. Web. 20 Dec. 2012. <http://digital.lib.msu.edu/projects/cookbooks/html/books/book_52.cfm>.


6 comments:

Aunt Jemima Party Pancakes (1956) ★★★★


Eggnog is something I enjoyed as a child, but my fondness for the holiday beverage declined over the years. To be honest, I haven't had eggnog in quite a few years, so I decided that using it as a flavouring for pancakes was probably a safe bet.

ANYWAY.

I stumbled across this two-page advertisement for Aunt Jemima Pancake Mix in LIFE magazine. Honestly it never even occurred to me to use different flavours of milk when making pancakes. Perhaps this would make strawberry milk palatable? (I'm sorry, but how can people drink that stuff?! My school once sold blue raspberry milk...ew, just ew.)

Original Recipe:

SO EASY! HERE'S HOW:
Deluxe pancakes. Makes 14 to 16 pancakes.

2 cups Aunt Jemima Pancake Mix
1 egg
2 cups milk
2 tablespoons butter or shortening
Add milk, egg and shortening to the Aunt Jemima pancake mix, stirring lightly. Bake on hot, lightly greased griddle, turning only once. 

For chocolate pancakes, use chocolate milk instead of regular milk.
For strawberry pancakes, use strawberry milk instead of regular milk.
For eggnog pancakes, omit the egg and use only one cup regular milk plus one cup dairy-made eggnog.

When serving several persons, stack pancakes and keep warm in oven.
-----
Serve six dollar-size pancakes per person and top each serving with whipped cream, sprinkling with nutmeg.


The Verdict:
Well first off, this makes SO MUCH PANCAKE BATTER. Seriously. Especially when you're making dollar-sized pancakes. If you are a few hungry people and are making regular-sized pancakes, this is an okay amount. Otherwise, please half it at the very least.
Taste-wise, these are okay. I definitely got a festive feeling eating them. The eggnog is definitely tasteable, but it's not super strong, so if you want to make these and really like eggnog, I would suggest maybed increased the eggnog to milk ratio, adding some to the whipped cream, or making an eggnog sauce to drizzle on top. The whipped cream and nutmeg did increase the eggnoggyness of the dish as well. And speaking of - the recipe didn't mention if the whipped cream should be sweetened or not, but I'm just saying, unsweetened whipped cream is kinda ew. Overall, not something I would make often, but I ate more than one of my own free will.

Modernized Recipe:
(Adapted from LIFE 23 Jan 1956)


2 tablespoons BUTTER or SHORTENING
1 cup MILK
1 cup EGGNOG
2 cups AUNT JEMIMA PANCAKE MIX
WHIPPED CREAM
NUTMEG

1. In a large mixing bowl, melt the butter. Whisk in the milk and eggnog. Add the pancake mix and whisk until well combined and lumps are gone.
2. Heat a fry pan or griddle to medium heat. Lightly grease. Drop one tablespoon of batter for each dollar-sized pancake. Fry until puffy and golden brown, flipping once when the edges begin to firm up.
3. Arrange the pancakes on a plate with whipped cream. Sprinkle the nutmeg over top.


3 comments:

Hawaiian Holiday Candies (1948) ★★★


This recipe is a little lighter than the usual Christmas fare, which was probably the point. I also love how Knox advertises itself as "wholesome". Later on, many of their advertisements focus on health benefits of gelatin, especially as a cure for cracked nails.
The line "For only about 35 c a pound!" also makes it apparent that even just three years out of World War Two, spending thriftily was still a concern.

Original Recipe:

Drain juice from: 1 (No. 2) can Dole crushed pineapple. Add enough water to make 2 1/2 cups liquid.
Soften: 4 envelopes Knox Gelatine in: 1 cup cold liquid (set aside)
Combine: 1 1/2 cups liquid   3 cups sugar   1/4 teaspoon salt

Bring to boiling point, stirring until sugar is dissolved. Remove from heat. Add gelatine; stir until dissolved. Add drained crushed pineapple. Return to heat. Boil slowly for 15 minutes. Remove from heat.
     Rinse 2 (8" x 4") pans (bread pan size) in cold water. Pour in candy mixture to depth of 1/4 inch. Put in a cool place (not in refrigerator) and let stand overnight.
     Then loosen candy around edges of pan with wet, sharp knife. Pull out on board lightly covered with confectioner's sugar. Cut in cubes and roll in confectioner's or fine granulated sugar.


The Verdict:
Umm....a little strange. The texture of the pineapple in the gelatin was kind of weird. I'm not sure that I like these enough that I would make them again, but they're not necessarily bad. The gelatin itself is not sweet at all, despite all the sugar in it. However, the sugar coating makes it too sweet. I think this was mostly because the cubes were a little damp, so they soaked up way too much sugar and made this sickly sweet layer of goopy crunchiness on the outside. I think I would rather just eat them without the sugar coating. 
Also, I admit that I did put these in the fridge. I don't get why the recipe said not to, especially since they just were not setting up well inside my warm house. Maybe that's why they were damp? I'm not sure...they are a bit delicate and jiggly, rather than firm. Maybe today's Knox packets contain less gelatin than in the past?
I give them three stars for an average rating. I think this recipe has potential, but perhaps needs some tweaking.

Modernized Recipe:
(Adapted from Knox, found at The Gallery of Graphic Design)

1 20 ounce can CRUSHED PINEAPPLE
4 envelopes KNOX GELATIN
2 1/2 cups DRAINED PINEAPPLE JUICE, with water added to make the full amount if necessary
3 cups SUGAR
1/4 teaspoon SALT
POWDERED SUGAR

1. Drain the juice from the canned pineapple. Add enough water to the drained juice to make 2 1/2 cups. Set aside in the fridge.
2. In a small bowl, combine the gelatin and 1 cup of the chilled pineapple juice. Set aside.
3. In a medium saucepan, combine the rest of the chilled pineapple juice (1 1/2 cups), the sugar, and the salt. Bring to a simmer and stir until the sugar is dissolved. Remove from heat and add the gelatin mixture. Stir, and add the drained crushed pineapple. Boil everything slowly for 15 minutes.
4. Rinse two 8x4 bread pans with cold water. Divide the candy between the two, about 1/4 inch thickness in each one. Set the pans in a cool place and let set overnight. 
5. When set, run knife rinsed in hot water along the edges of the pans to loosen (you may need a spatula as well). Turn the candy out onto a cutting board which is covered with powdered sugar. Cut the candy into cubes and roll in the sugar to coat.


2 comments:

Cocoanut Dainties (1931) ★★★★


I found this recipe at The Old Foodie. I liked it because it looked super simple and I also thought it would be a good treat for Little Y, who loves coconut. They're also pretty cheap to make, with only 3 ingredients.

Original Recipe:
Cocoanut Dainties.

Here is some cooking which a small child could do. The ingredients needed are:-

Four table-spoonfuls of sugar, 8 tablespoonfuls of desiccated cocoanut, and the whites of two eggs. Beat the whites of the eggs to a froth, add the sugar, and beat well again. Then stir in in the cocoanut.

Drop teaspoonfuls of this mixture on to a greased slide, and bake about 10 or 15 minutes in a moderate oven.

(A Parrot Card is awarded to Jean Douglas, Coast Road, Mirboo [?] North, Gippsland.)


The Verdict:
Not bad. I'm not a huge fan of coconut either, but I don't mind these. They did turn out pretty chewy, and I was hoping for more of a crunchy meringue, but still good (I realized as I was writing this up that I accidentally used half the amount of sugar. I didn't even notice, however, I wonder if that had anything to do with the texture.)! Perhaps they could benefit from a splash of vanilla, but otherwise they're fine as is. They're a great option for when you'd like a sweet treat but are lazy. It took minutes to whip these up and the great thing is that they don't spread, so you could probably even fit all of them on one baking sheet. They are best eaten the day of, because otherwise they tend to get sticky, even in this dry winter air.
Yield: 16 dainties


Modernized Recipe:
(Adapted from the Children's pages of The Argus, December 12, 1931, found at The Old Foodie)

2 EGG WHITES
4 tablespoons SUGAR
8 tablespoons DESICCATED COCONUT
1 teaspoon VANILLA EXTRACT (optional)

1. Preheat oven to 350F. Line a cookie sheet with parchment paper.
2. In a large bowl, beat the egg whites until frothy. Add the sugar and beat until stiff peaks form. Gently fold in the coconut.
3. Drop teaspoonfuls of the mixture on the prepared cookie sheet. Bake about 10 or 15 minutes until the tips become golden brown. Let cool and store in a well-sealed container.


0 comments:

Poinsettia Salad/Fruit-Salad Dressing (c.1928) ★★★★

I have this jar of maraschino cherries that has been sitting in my fridge for ages, because I bought them for some other historical recipe and never used them again. When I came across this recipe I knew I had to make it. I'm killing two birds with one stone here: using up some cherries AND making a recipe for my 4 Weeks of Yuletide.

Because there was no dressing specified, I decided on using the recipe for Fruit-Salad Dressing from the same cookbook. Because I was lazy, I didn't bother actually making up a whole batch of it, and just combined the ingredients without the eggs. I imagine it would have thickened up to something like a curd and probably would've been quite tasty over this salad.


Original Recipe:
85. POINSETTIA SALAD--Cream cheese, such as Neufchâtel or Philadelphia cream cheese, combines very well with some fruits and vegetables. It is used with pineapple and cherries in the preparation of poinsettia salad, which is illustrated in Fig. 11. As can be imagined, this makes a pretty decoration for a Christmas table or a salad to be served around holiday time.

POINSETTIA SALAD
(Sufficient to Serve Six)
  • 1 pkg. cream cheese
  • Lettuce
  • 2 Tb. cream
  • 4 maraschino cherries
  • 1/4 tsp. salt
  • Salad dressing
  • 6 rounds pineapple
Mix the cream cheese with the cream and salt, and form this into small round balls with the fingers. Place the rounds of pineapple on salad plates garnished with lettuce, and put the cheese ball in the center of the pineapple. Cut the maraschino cherries in half, and then cut each half into narrow strips that resemble petals of a flower. Place five or six of these over the top of the cream cheese with the points meeting in the center, as shown in the illustration. Serve with any desired dressing, but instead of adding the dressing to the salad put it in a mayonnaise bowl and allow each person at the table to add it.

74. FRUIT-SALAD DRESSING.--Various dressings may be served with fruit salad, and usually the one selected depends on the preference of those to whom it is served. However, an excellent dressing for salad of this kind and one that most persons find delicious is made from fruit juices thickened by means of eggs. Whenever a recipe in this Section calls for a fruit-salad dressing, this is the one that is intended.
FRUIT-SALAD DRESSING
  • 1/2 c. pineapple, peach, or pear juice
  • 1/2 c. orange juice
  • 1/4 c. lemon juice
  • 1/4 c. sugar
  • 2 eggs
Mix the fruit juices, add the sugar, beat the eggs slightly, and add them. Put the whole into a double boiler and cook until the mixture begins to thicken. Remove from the fire and beat for a few seconds with a rotary egg beater. Cool and serve.
The Verdict:
Umm...kind of weird. Because the cream cheese was salted, it was confusing and strange with the sweet dressing and fruit. It wasn't bad, though. I think with some modifications  I would actually eat this and even make it again. I would add sweetener and perhaps some vanilla or lemon flavouring to make the cream cheese more like a raw cheesecake ball. Also, the cream is really unnecessary? And maybe use 2 or 3 rings of pineapple, because, um, this "salad" is a really pathetic amount of food. It's obviously supposed to be mostly ornamental, likely as part of a crazy historical meal with 24 courses or something. I give it 3 stars as is, or 4 stars with the above modifications.


Modernized Recipe:
(Adapted from Woman's Institute Library of Cookery, Vol. 4)
LETTUCE, 1 leaf per person
PINEAPPLE, 1-3 rings per person
MARASCHINO CHERRIES, 1-2 per person
CREAM CHEESE, 2 tablespoons per person
SUGAR, 1/2 teaspoon per person
VANILLA or LEMON extract

1/2 cup PINEAPPLE JUICE (if using canned pineapple, use the juice from the can)
1/2 cup ORANGE JUICE
1/4 cup LEMON JUICE
1/4 cup SUGAR
2 EGGS

1. Prepare the dressing by mixing all ingredients in a double boiler or in a saucepan over low heat. Cook until thickened and beat with a hand mixer when done. Let cool.
2. Wash and dry the lettuce leaves. In a bowl, mix together the cream cheese, sugar, and flavouring. Let it sit in the fridge if it needs to firm up before forming into balls. Slice the cherries into thin strips.
3. Assemble the plates as pictured: lettuce, pineapple, cheese ball. Arrange the strips of cherry on top of the cheese ball to make a flower shape.
4. Serve with the dressing on the side.


5 comments:

Sint Nickolaas Koekjes (Speculaas) (1937) ★★★★★

Ginger Bread by Anton Pieck (1895 - 1987)
My maternal grandparents emigrated to North America after WWII. As a result, I have a long-time love of Speculaas - and not just at Christmastime! And imagine my surprise when the flavour of this traditional cookie went mainstream over the past year, with the cult following of speculoos spread/biscoff cookie butter.

Speculaas are something like a Dutch answer to gingerbread (which was super popular in the British Isles). Like gingerbread, speculaas can be made different ways: thin and hard, thick and bready, or filled with almond paste. While the terms speculaas and speculoos are often considered fairly interchangeable, there is a difference. Add in "biscoff" and the whole thing just gets downright confusing. Speculaas is a Dutch word for the cookie, which is usually of the thicker, bready type, more like (non-crispy) gingerbread. Speculoos is the Belgian word and tends to be a thin, hard cookie with less spice. Biscoff (biscuit + coffee) is the name that speculoos are sold under in North America. Therefore speculoos = biscoff, which do not = speculaas.

Although the texture may be different, the flavour of speculaas appears in many lowland European countries, especially in holiday sweets. The etymology of the word "speculaas" is not definite, but the two most popular theories are that it is derived from the word "speculum" or "specie". Speculum ("mirror") would refer to the mirror image of the stamps or molds, while specie would connote a "spiced" cake. Two other options are the  Latin word "speculator" to refer to St. Nicholas (Sint Nickolaas), "he who sees everything", or "specerij", which again, means "spice". In Germany they are known as spekulatius. There is also a local variety from Hasselt, Belgium, called speculation, which was licensed in 1870.

The cookie itself dates back to at least the Middle Ages, when cinnamon, nutmeg, and cloves were commonly used and foods such as gingerbread were popular. They were certainly being baked by the 15th century, when couples in love would express their desires through the gift giving of speculaas, shaped as humans or even in a representation of St. Nicholas himself. While originally based in religious iconography, nowadays speculaas come in a variety of shapes, including elephants, horses, ships, farmhouses, windmills, chickens, trees, birds, etc. Prior to around 1850, speculaas were made from rye flour and honey, resulting in a very hard cookie which could only be eaten when softened.

In the Netherlands, the feast of St. Nickolaas (Sinterklaas) is celebrated on December 5th, so hence the date for this post. 

I found this specific recipe on a website for a Dutch historical village in Pella, Iowa, which was founded in the 19th century by Dutch immigrants. The recipe comes from a 1937 community cookbook which was full of ethnic recipes (as community cookbooks often are). Perhaps this is why the recipe specifies that these are "Sint Nickolaas Koekjes". Any Dutch person would certainly know the tradition of "speculaas", so the recipe title must indicate that the recipe and hence the cookbook were for a broader audience. As a disclaimer, I do not know if any revisions were made by the website, so the recipe may not have been originally written in this form. However, given the sparse instructions, I don't think many - if any - changes have been made.


Original Recipe:
Dutch Santa Claus Cookies
Sint Nickolaas Koekjes (Speculaas)

10 oz. butter
1 egg
10 oz. brown and white sugar mixed
2 t. cinnamon
1 t. nutmeg
1/2 t. cloves
1 lb. flour
1 t. soda dissolved in 2 T. sour milk

Mix—form into ball—chill.
Slice thin and bake.

The Verdict:
I was curious to see how this would work out, because normally speculaas (at least today) contain far more spices, including ginger, star anise, coriander, and white pepper. There are also no directions for mixing, so I followed the usual standard for making cookies. However, I have seen some recipes which follow the steps for making pastry: cut the butter into the flour and then adding the other ingredients.
The cookies were delicious, although a tiny bit bland spice-wise. If you like a real punch of spice, this is not the cookie. Or it could be, just add more spices. Ginger would really help, I think. Nevertheless, they are yummy as is! I would certainly make and eat these again happily. Mr. Man enjoyed them as well. They are soft and delicious right out of the oven, but harden up just a bit once cooled. They're also not super sweet, which is nice because it means you can eat five and still feel okay. Not that I tried...
Yield was 30 cookies, slightly smaller than my palm.

Modernized Recipe:
(Adapted from Genuine Holland Recipes, found at Pella Tulip Time)

10 ounces UNSALTED BUTTER
5 ounces BROWN SUGAR
5 ounces WHITE SUGAR
1 EGG
2 teaspoons CINNAMON
1 teaspoon NUTMEG
1/2 teaspoon CLOVES
1 teaspoon BAKING SODA
2 tablespoons BUTTERMILK
1 pound FLOUR

1. In a large bowl, beat together the butter and sugar. Mix in the egg. Add the spices.
2. Dissolve the baking soda in the buttermilk (or use regular milk with some lemon juice to make it sour) and stir into the dough. Blend in the flour and knead until well-combined. You may need extra flour. It should not stick to your hands.
3. Form the dough into a ball or a log and refrigerate overnight. I would suggest the log, otherwise you're going to have to wait for an hour for the dough to come to room temperature to roll by hand.
4. To bake the cookies, preheat oven to 350F. Slice into small rounds or roll into balls (or use a speculaas mold if you happen to have one). Bake on a cookie sheet for about 14 minutes.

-----
Sources

Muusers, Christianne. "Speculaas with Rich Almond Stuffing." Coquinaria. 29 Oct. 2004. Web. 03 Dec. 2012. <http://www.coquinaria.nl/english/recipes/speculaas.htm>.


"SPECULAAS FROM HASSELT." Grandma's Design | Recipes. European Commission. Web. 03 Dec. 2012. <http://www.grandmasdesign.com/media.php?recipes=NTAwMjA=>.

"Speculoos." Wikipedia. Wikimedia Foundation, 28 Nov. 2012. Web. 03 Dec. 2012. <http://en.wikipedia.org/wiki/Speculoos>.

"Vermeiren Speculoos." Vermeiren Speculoos. 2012. Web. 03 Dec. 2012. <http://www.vermeirenprinceps.be/index.php?prodid=>.

2 comments:

Hot Dr Pepper (1964) ★★★★


When I came across this recipe it really intrigued me. I liked Dr Pepper, but how would it taste when hot?
Also, this is a ridiculously easy and budget-friendly recipe. Which is nice when I want to post something here but don't have much time or money ;)


Dr Pepper was created in the 1880s and first sold sometime around 1885. I love some of the early slogans: "King of Beverages" (1889–1914), "When You Drink a Dr. Pepper You Drink a Bite to Eat" (1939), and "America's Most Misunderstood Soft Drink" (1960s). Perhaps the reason it's so "misunderstood" is because of its "devilish" behaviour.

Original Recipe:
For something different - devilishly different for the holidays - try Dr Pepper piping hot. here is a bracing, cool weather refreshment that lends a holiday spirit to any occasion. Just heat Dr Pepper in a saucepan until it steams. Pour into a glass or cup over a slice of lemon and serve piping hot. And for those who want something special...Try the Boomer...that's Hot Dr Pepper with a dash of rum. Enjoy Hot Dr Pepper often.


The Verdict:
It was pretty good. It tasted nice, and the lemon was pretty strong, but in a good way. I would drink it again by choice. It reminded me of tea. That said, I think I prefer hot apple cider as my holiday beverage of choice (and it's healthier than pop!). I prefer cold Dr Pepper with a slice of lemon. When it heats up it looses all the carbonation and and the taste becomes a little flat. Now, I didn't try it with rum, so perhaps that would've been different. If anyone tries it, comment below!


Modernized Recipe:
(Adapted from The Dr Pepper Company, found at Hey, My Mom Used to Make That!)

It's heating up a pre-made drink with a slice of lemon. No directions needed.


7 comments:

4 Weeks of Yuletide: Recipe Round-up


The blogs I have listed on my sidebar to the right have some great holiday recipes. I've saved you the hassle by going through and compiling them all here in one post. Some of my upcoming yuletide recipe posts will also be from this list.

Hey, My Mom Used to Make That!
For a Perfect Egg Nog (1936)
Old Time Fruit Cake (Undated)
No-Baking Festive Fruit Cake (1957)
JELL-O Gelatin Jigglers (1980s)
Butterscotch Rolled Cookies (Undated)
Holiday Chocolate Butter Cookies (1992)
Butterscotch Yule Log (1967)
Irresistible Peanut Butter Cookies (1992)
Hot Dr Pepper (1964)
Campbelled Eggs (Undated)
Midori Melon Liqueur Cocktails (1979)
Jellied Cranberry Salad/Cranberry Noel Dessert/Cranberry Orange Relish (Undated)
Bacardi Rum Cake (1992)
Domino Gingerbread Men (1992)
Le Punch (1979)

Vintage Ads (You may need to join the group to see some entries)
Fruit Cocktail Eggnog Pie (1956?)
Trim-a-Tree Dip (1967)
"Philly" Pate (Undated)
Borden's Egg Nog (1951)
Atora's Tough Guy Christmas Pudding (1961)

Dinner Is Served 1972
Holiday Glogg (1973)

Historic Cookery
New Year's Cake (1796)
Twelfth Cakes (1801)

The Old Foodie
Vintage Christmas Recipes (1553 - 1944)
Christmas Charlotte Russe/Bethlehems (1912)
The Christmas Pudding (1852)
A Chilly Christmas Dinner/Potato Hash (1866)
Christmas Bread (1891/1897)
A Bill of Fare for Christmas Day (1674)
Christmas Guests: Menus for Three Days (1930)/Watercress and Celery Stuffing (1956)
Mince Pies (1868)/Roast Goose (1887)
Plum Pudding (1931)
Creole Coffee Pudding (1944)
Christmas Jelly (1904)
Christmas Ice-Cream Pudding (1951)/Christmas Trees on Ice Cream (1952)
Plum Pudding Glace (1879)
Christmas Cakes for Good Children (1870)
Christmas Ham Recipes (1882 - 1953)
Egg Nogg (1862)

Four Pounds Flour
Another Christmas Cookey (1796)
Charles Dicken's Punch (1847)
A Dollar Christmas Dinner (1878)

Gram's Recipe Box
Vintage Holiday Recipes

The Mid-Century Menu
Snowman Cut-up Cake (1975)
Party Cheese Ball (1971)
Dear Santa Cake (1956)
Pork Cake (1950s)
Chill-and-Bake Cranberry Cake (1961)
Cheezy Beans and Onions/Creamy Pumpkin Pie/Jiffy Quick Dressing/Snappy Sweet Potatoes (1967)
Chocolate Marshmallow Punch (1971)

Researching Food History - Cooking and Dining
Black Cake (1823)/Fruit Cake (1840)/Christmas cake (1919)/Black Cake (1845)

Vintage Recipe Cards
Crispy Gingerbread Cookies (1984)
Candy Cane Cookies (1971)
White Fruitcake (1973)
Quick Holiday Fruitcake (1971)
Christmas Confections (1971)
Country Christmas Bread (1984)
Christmas Cake Cookies (1973)
Steamed Holiday Pudding (1971)
Party Cheese Ball (1973)
Shrimp Christmas Tree/Eggnog/Eggnog Cooler (1977)
Outback Ice Christmas Pudding(1972)
Sleigh Cake (1967)
Santas Whiskers (1979)
Christmas Candle Salad (1958)


0 comments:

Buffalo Cake/Lemon Honey (1914) ★★★

I couldn't dig up much information on this oddly named cake. I found one modern blogger who has a very similar recipe. She labels it "retro" and says:
"This is a cake I remember fondly from my childhood. I have no idea where it came from, it’s a handwritten recipe in my mum’s recipe folder. Searching online brings no answers either!
It’s a simple sponge with a lemon & coconut icing. Resist eating it for a day or so if you can as it improves with age – it gets heavier and denser. I loved it when I was a child – my mum used to cut it into squares about 2″ x 2″." 
It seems that this blogger is from the United Kingdom. That shows an interesting link between what was eaten in New Zealand and what was eaten in the British Isles. 
On a completely different note, I also found a North American "Buffalo Cake" which has sour cream, nuts, and melted chocolate chips in it. Interesting!
I'm quite surprised by this cake, really. Considering the amount of eggs, butter, and sugar - not to mention fresh lemons! - it must have been very expensive to make, especially in wartime. That said, The Sure to Rise Cookery Book was originally published in 1908, so this is very likely a pre-war recipe. I wonder how much use it got in the coming years.


Original Recipe:


The Verdict:
I wasn't sure if "sponge sandwich tins" meant to just cook two layers, or if these are supposed to be mini cakes. I went with 2 large layers, just because the recipe is called "Buffalo Cake", singular. I used all purpose flour. The recipe was easy enough to follow, but I wish it had included milk in the ingredients list. The cake is okay - not spectacular, and quite plain on its own. With the filling and icing it was good, though.
The lemon honey (which is ironic, because there is no honey in it) didn't really thicken as much as I had hoped. I cooked it for a while, but it didn't get any thicker than runny honey (ha ha). It stayed inbetween the layers well enough, but it was still a little runnier than I would have preferred. Taste-wise it was good. There was also a ton of it left over, so the recipe should be halved, at least.
There was no recipe in the book for icing, so I just went with powdered sugar and lemon juice. Simple enough.
Mr. Man thought it was tasty, but too sugary. I feel like this was probably because of the icing. Overall, I don't think I'd make this again, just because of the effort in making the curd for just an average taste. I would eat it voluntarily, though, so it's not all bad. I just feel like I've made better historical and modern lemon cakes.


Modernized Recipe:
(Adapted from The Sure to Rise Cookery Book)

Buffalo Cake
1/4 pound UNSALTED BUTTER
3/4 cup SUGAR
2 EGGS
1 1/4 cups FLOUR
2 teaspoons BAKING POWDER
MILK, to thin

Lemon Honey
1/2 pound SUGAR
2 LEMONS, juiced and zested
2 ounces UNSALTED BUTTER
2 EGGS

Lemon Icing
POWDERED SUGAR
LEMON JUICE

1. Preheat the oven to 350F. Grease and flour two sponge tins or cake pans.
2. In a medium mixing bowl, cream together the butter and sugar. Beat in the eggs. Add the flour and baking powder. Little by little, add enough milk to make a thin batter.
3. Evenly divide the batter among the two prepared pans. Bake for about 20 - 30 minutes, or until a toothpick comes out clean.
4. Meanwhile, make the lemon honey by mixing all the ingredients in a medium saucepan and cooking over low to medium heat until thickened.
5. When the cake and the lemon honey are cool, but together. Mix together enough powdered sugar and lemon juice to make an icing and spread over the top of the cake. Serve.


5 comments:

4 Weeks of Yuletide

A Christmas Dole by Joseph Clark, 19th century

Today is my last day of classes! Which means that December - and Christmas - is right around the corner. I have a lot of free time in December, so it's my plan to publish at least one holiday-themed historical recipe each week. Ideally, I'd like to do more than 5 posts, but I will also have my hands full with catching up on housework, freezer cooking to prep for next semester, and taking care of Little Y. Not to mention visiting family. So my promise to you is 5 posts, at least. I won't be focusing on any particular time period, so expect a wide range of recipes. Because December 1st is a Saturday, I will do my first post then. So scheduled posts will be December 1, 8, 15, 22, 29. I hope you come visit Kitchen Historic in December to learn a little bit about how the holiday season was celebrated in the past!


2 comments:

Chocolate Eclairs (1887) ★★

Well, chocolate eclairs wouldn't be the first food I think of when I think of what to eat at Thanksgiving, but apparently they were appropriate during the 1880s at least! Perhaps this was due to the relative novelty of the dish - it seems that the first English recipe for eclairs was just published in 1884. But - what more American source than the Whitehouse Cookbook to validate their appearance on a Thanksgiving menu!

Eclairs are listed under "Supper," which would be lunch to us modern folk. For the curious, here's the menu in full:
Breakfast: grapes, oat flakes, broiled porterhouse steak, codfish balls, browned potatoes, buckwheat cakes, wheat bread, coffee
Supper: cold roast turkey, scalloped oysters, potato salad, cream short-cake, eclairs, preserved egg plums, tea
Dinner: oysters on half shell, cream of chicken soup,  fried smelts, sauce tartare, roast turkey, cranberry sauce, mashed potatoes, baked squash, boiled onions, parsnip fritters, olives, chicken salad, venison pastry, pumpkin pie, mince pie, charlotte russe, almond ice-cream, lemon jelly, hickory nut cake, cheese, fruits, coffee

Overall, the dinner menu looks quite similar to something we'd see today, although perhaps a little...more elaborate. The only thing I think is missing is sweet potatoes, and of course there are a few oddities (fried smelts, boiled onions), but overall the link to modern Thanksgiving is obvious.

Happy Thanksgiving, from 1887!


Original Recipe:

CHOCOLATE ECLAIRS.
Make the mixture exactly like the recipe for "Boston Cream Cakes." Spread it on buttered pans in oblong pieces about four inches long and one and a half wide, to be laid about two inches apart; they must be baked in a rather quick oven about twenty-five minutes. As soon as baked ice with chocolate icing, and when this is cold split them on one side and fill with the same cream as "Boston Cream Cakes."
BOSTON CREAM CAKES.
Put into a large-sized saucepan half a cup of butter and one cup of hot water; set it on the fire; when the mixture begins to boil, turn in a pint of sifted flour at once, beat and work it well with a vegetable masher until it is very smooth. Remove from the fire, and when cool enough add five eggs that have been well beaten, first the yolks and then the whites, also half a teaspoonful of soda and a teaspoonful of salt. Drop on buttered tins in large spoonfuls about two inches apart. Bake in a quick oven about fifteen minutes. When done and quite cold, open them on the side with a knife or scissors and put in as much of the custard as possible.
Cream for Filling.—Made of two eggs, three tablespoonfuls of sifted flour (or half cup of cornstarch) and one cup of sugar. Put two-thirds of a pint of milk over the fire in a double boiler; in a third of a pint of milk, stir the sugar, flour and beaten eggs. As soon as the milk looks like boiling, pour in the mixture and stir briskly for three minutes, until it thickens; then remove from the fire and add a teaspoonful of butter; when cool, flavor with vanilla or lemon and fill your cakes.

PLAIN CHOCOLATE ICING.
Put into a shallow pan four tablespoonfuls of scraped chocolate, and place it where it will melt gradually, but not scorch; when melted, stir in three tablespoonfuls of milk or cream and one of water; mix all well together, and add one scant teacupful of sugar; boil about five minutes, and while hot, and when the cakes are nearly cold, spread some evenly over the surface of one of the cakes; put a second one on top, alternating the mixture and cakes; then cover top and sides, and set in a warm oven to harden. All who have tried recipe after recipe, vainly hoping to find one where the chocolate sticks to the cake and not to the fingers, will appreciate the above. In making those most palatable of cakes, "Chocolate Eclairs," the recipe just given will be found very satisfactory.


The Verdict:
I was super excited when these were baking, but alas, my dreams were crushed. Firstly, I undercooked the pastry. I've never made eclairs before, so I didn't realize until it was too late. Because of that they fell, were gooey instead of crisp, and tasted eggy. The chocolate icing was tasty, but grainy from using regular sugar. The filling was edible, but not my favourite flavour. It was basically identical to the blancmange I made a little while ago. I would've much preferred whipped cream. They are edible, but I won't eat them, unfortunately. I think if I didn't make as many mistakes the pastry could've been good, but personally I just don't like the filling, so the whole recipe is pretty much moot.
Oh, and they are ugly, aren't they? The filling was running out, but possibly just because I didn't let it cool completely. Little Y saw the photos and said, "Ewwwww, gross!" Haha!

Modernized Recipe:
(Adapted from The Whitehouse Cookbook)

Eclairs
1/2 cup UNSALTED BUTTER
1 cup HOT WATER
1 pint (2 cups) FLOUR, sifted
4 EGGS, separated
1/2 teaspoon BAKING SODA
Pinch of SALT

Chocolate Icing
4 tablespoons BAKING CHOCOLATE, finely chopped or grated
3 tablespoons MILK
1 tablespoon WATER
1 cup SUGAR

Filling
1 pint (2 cups) MILK
1 cup SUGAR
3 tablespoons FLOUR
2 EGGS, beaten
1 teaspoon BUTTER
VANILLA or LEMON EXTRACT

1. In a medium saucepan, melt the butter and hot water. When it starts to boil, remove from heat and add in the flour. Mix well until a smooth dough forms (a potato masher may be useful). Let cool.
2. Preheat the oven to 400F. Meanwhile, separate the eggs into two bowls. Beat the whites until stiff peaks form and then beat the yolks until frothy.
3. When the dough is cool, beat in the yolks and fold in the whites, baking soda, and salt.
4. Line a baking sheet with parchment paper and put the finished dough into a ziploc bag (or pastry bag). Cut off one corner of the bag to be about 1.5 inches wide. Use the bag to squeeze out 4-inch tubes of dough, keeping them about 2-inches apart. If needed, use your fingers dipped in water to smooth out the tops and edges. Bake for 20 - 25 minutes.
5. While the eclairs are baking, make the chocolate icing. In a small saucepan, add the chopped chocolate. Put it on top of the stove or somewhere warm to gradually melt. When melted, stir in the milk and water. Add the sugar and boil it all together for about 5 minutes. When the eclairs are baked and nearly cold, ice them.
6. To make the filling, put two-thirds of the milk in a double boiler. In a separate bowl, mix the other third of milk, sugar, flour, and eggs. Just before the milk boils, stir in the mixture and whisk for three minutes or until thickened. Add the butter and flavouring, stir, and let cool. When the eclairs are cool as well, split them open  on one side and fill.


0 comments:

A Filling for Tarts (1900) ★★★★★

Butter tarts are one of the very few foods that Canada claims as its own. And yet it shares many similar features with other treats from around the world (pecan pie, shoofly pie, treacle tart, Ecclefechan tart, etc.). Perhaps these were the inspiration for whoever created the first butter tart. As it stands now, all we really know is that the first known printed recipe appeared in the 1900 cookbook produced by the Royal Victoria Hospital’s Woman’s Auxiliary in Barrie, Ontario. The recipe gained enough popularity to be printed in the Toronto Daily News in 1908 and to have six versions in the Canadian Farm Cook Book of 1911. At the same time, butter tarts were far from universal; I examined a few cookbooks from throughout the early 20th century and the best I could find was one recipe for "Egg Tarts" in a 1934 cookbook from Halifax. Perhaps its a regional issue?


A National Archives of Canada exhibition revealed the butter tart as a key source of Canadian identity (an especially idealistic one at that):
"Forget the beaver, forget the glorious maple leaf, forget the majestic and haunting loon – for all these years the country has completely overlooked the most important contribution to our identity as a nation, the butter tart…. The delicate crust supports the rich and creamy centre just as the oceans border our natural resources and the people and the animals that dwell here. Variations and sizes of butter tarts abound, just as there are so many varied cultures living harmoniously in our wonderful country. The Americans have their symbols and sayings, eagles and apple pies, bombs and movie stars. We have the butter tart. Born and baked in this incredible land of ours to be a constant reminder of how sweet and likeable we are."

I went with the apparent original recipe, but you could also try your hand at this one from circa 1950.

Original Recipe*:

FILLING:
2 cups boiling water
1 cup currants
1 cup brown sugar.
1/2 cup salted butter, softened
2 large eggs, slightly beaten

PASTRY:
12 tart-sized pastry shells

PREPARATION: Place pastry shells on cookie sheet, or line 12 muffins cups with prepared pastry.
Place currents in medium-sized bowl and cover with boiling water. Allow to stand five to 10 minutes. Drain currants, discard water, and place currants back in the same bowl. Whisk in brown sugar and butter, and combine well. Blend in eggs.

Spoon filling into tart shells until three-quarters full (make sure currants in the liquidity mixture are evenly distributed in each shell).

Bake in bottom third of 400F oven for about 15 to 20 minutes, or until filling is puffed and bubbly and pastry is golden. Let stand on rack for 1 minute. Immediately run flat metal spatula around tarts to loosen (this will help prevent sticking). After five minutes, carefully slide spatula under tarts and transfer to rack to cool. Makes 12.

The Verdict:

Delicious! Mr. Man and I both enjoyed these. I was worried about the dried fruit, but it wasn't bad at all. I substituted raisins for currants because I couldn't find any at my grocery store. Although it seems like currants were preferred in the earliest recipes, modern recipes usually call for raisins, so it is still partially authentic anyway. I also used pre-made tart shells, just out of laziness and because there was no recipe given (it's just for the filling). Plus pastry has stayed pretty much the same throughout history. The filling was gooey, not runny or firm. Also, I had enough for maybe 20 tarts and only bought 12 shells, so there's lots left over.

Modernized Recipe:

(Adapted from the Royal Victoria Hospital’s Woman’s Auxiliary Cook Book)

Already modernized.

*This is apparently the recipe from 1900. I took this from a website, so I can't verify it's authenticity. It was already modernized, so this is unlikely how it was originally printed.

-----

Sources


Elphick, Katherine. "RVH Cookbook Boasts One of First, Printed Butter Tart Recipes." CottageCountryNow.ca. 12 Feb. 2008. Web. 11 Nov. 2012. <http://www.cottagecountrynow.ca/cottagecountrynow/article/387501>.

Jacobs, Hersch. "Structural Elements in Canadian Cuisine." Cuizine: The Journal of Canadian Food Cultures 2.1 (2009): Web. <http://www.erudit.org/revue/cuizine/2009/v2/n1/039510ar.html#no62>.

Nuttall-Smith, Chris. "Eat, Drink and Be Daring." Toronto Life. Dec. 2007. Web. 11 Nov. 2012. <http://www.torontolife.com/features/eat-drink-and-be-daring/?pageno=7>.

"Canada Day: Iconic Canadian Foods." Shine from Yahoo! Canada. June 2012. Web. 11 Nov. 2012. <http://ca.shine.yahoo.com/photos/canada-day-iconic-canadian-foods-slideshow/butter-tarts-photo-1340643073.html>.

32 comments:

The Wimodausis Club Cook Book (1922)

9:34 AM 1 Comments


On Friday I went on an adventure with Mr. Man and Little Y into the big city, a.k.a. Toronto. It was the last weekend of the Royal Winter Fair, which is a huge agricultural event here in Ontario. One of the main reasons I wanted to go was to check out an old bookstore, at which I bought my other old cookbook, The Blue Ribbon Cookbook. Canadian cookbooks can be hard to come by online, so it's nice to have some in hand.
There were three which caught my eye, but I ended up getting only this one, because it was the oldest. It's a community cookbook, printed in 1922 for the Wimodausis Club. The man who sold it to me asked if I knew what the club was, and I had to admit I had no clue what I was buying. It stands for Wives Mothers Daughters Sisters. Apparently they were a big deal in Toronto. Here's a more detailed history of them, taken from the Toronto Archives:


"The Wimodausis Club was founded in 1902 at the Sherbourne St. Methodist Church by Mrs. James Hale and four of her pupils: Miss Florence Bradshaw (Mrs. Norman Tavell), Miss Mina Flavelle (Mrs. Wallace Barrett), Miss Muriel Larkin, and Miss Florence Hurrington. The club was formed to stress the value of personal service and responsibility to the community. The name 'Wimodausis' was chosen as an abbreviation for wives, mothers, daughters, and sisters. Many prominent Toronto women were members of the Club, including Lady Eaton and Lady Flavelle.
In the 1920s, a branch called the Junior Wimodausis Club was formed. This group consisted of daughters and granddaughters of current Wimodausis Club members. In 1946 the Junior Wimodausis Club, with Mrs. Harry Graham as president, took over the duties of the Wimodausis Club. Those who had been members of the Wimodausis Club prior to this change became the Wimodausis Auxiliary, with Frieda Clark as president. The second Junior Wimodausis Club was formed in 1953 and was elevated to become the next Wimodausis Club in 1973, thus creating a second Wimodauses Auxiliary group. A third Junior Wimodausis Club was formed in 1986, but they disbanded before elevating in 1992. 
An early focus for the club was raising money through sewing and bazaars to help a young native girl named Helen Amos at the Elizabeth Long Memorial Home in Kitimat, B.C. They also raised money for equipment for kindergartens in Japan. Starting in 1914, the Club began to aid the Earlscourt Children's Home (also known as the Earlscourt Child and Family Centre). In 1918, the Club acquired a large house on St. Clair Gardens, and donated it to be used for the Children's Home. In 1949 the Wimodausis Club donated a camp at Pigeon Lake for the children of Earlscourt Home. The camp was used until the mid-1970s. After the closure of the Pigeon Lake camp, a new summer camp was created in 1982 and renamed Camp Wimodausis in 1989. The Club also raised money to build a new house for the Earlscourt Children Home, when the old one had fallen into disrepair in 1957. The Club also supported the Bond Street Nursery School and a dozen other Toronto institutions. 
During the Second World War, the Club participated in war effort and city relief activities, aiding the veteran hospitals, holding repatriation suppers for the armories, and sending overseas packages to soldiers. The Club also organized a number of regular fundraising activities, including cookbook sales, raffles, dance benefits, garden parties, and widely advertised annual antique shows. The Club opened a gift store called 'The Opportunity Shop' in 1941. The shop stayed open until 1952, selling what was referred to as 'hidden treasures', items donated by the friends of the Club. Sixty percent of the store's profits were given to the war fund and Earlscourt Children's Home. The shop was supported by both T. Eaton Company and Royal Ontario Museum. The shop also provided a meeting place for the Club. 
The final fundraising events held by the Wimodausis Club were held in 1997-1998 in the form of three theatre nights at St. Lawrence Centre. The Wimodausis Club was dissolved in 2002 due to decreasing enrollment and interest. When the Wimodausis club finally shut its doors in 2002, all the remaining funds of the corporation were given to the Bond Street Nursery School."


My copy of the cookbook is quite beaten up on the outside, but the inside is practically pristine. There are almost no food stains and almost no writing. I can only guess that the owner either didn't use it or was purposefully careful to keep her books tidy.
There are some neat recipes in here that I would like to try, so keep an eye out on this blog for recipes like Curly Peters, Banana Peanut Frosting, Marshmallow Dessert, Heavenly Hash, Spaghetti Loaf, Ginger Cordial, and Walnut Crisp.
Recipes I may not be so brave as to try include Combination Banana Sandwiches (bananas, bacon, eggs, and paprika), Spinach and Tongue Salad, and Sweetbread and Mushroom Pie.


1 comments:

A Butter Drop (1796) ★★★

I had some time on my hands so I thought I would make a quick cookie recipe to share with you all!
I wanted to do something a little older, since I've been stuck in the 20th century for a while. Actually, I found this kind of interesting. The newer recipes seem to appeal more to my modern tastes. Even just making these recipes really demonstrates how our tastes and ingredients have transformed over the centuries.

Anyway, this recipe is from the 1796 cookbook by Amelia Simmons. Her cookbook is recognized as the first known cookbook published in America (as opposed to imported from Europe). Additionally, the book enjoyed immense popularity and was printed in at least 13 different editions, not to mention the plagiarized versions which were also published. What is interesting to note is that the book was written only a few years after the end of The American Revolution. Clearly this cookbook reflected the creation of the independent American identity. Also - in the spirit of Thanksgiving - American Cookery contains the first known recipe for turkey with cranberries.

Although the recipe doesn't include anything in the way of instructions, there is a very similar recipe in the cookbook for Butter Drop Do: "No. 3. Rub one quarter of a pound butter, one pound sugar, sprinkled with mace, into one pound and a quarter flour, add four eggs, one glass rose water, bake as No. 1."


Original Recipe:
A Butter Drop.
Four yolks, two whites, one pound flour, a quarter of a pound butter, one pound sugar, two spoons rose water, a little mace, baked in tin pans.

The Verdict:
Not bad. I'm not a huge fan of rosewater, so at first I didn't like these much. Also, the mace reminded me too much of green beans (my family eats nutmeg on beans). Mr. Man said he loved them, though, and Little Y ate hers without a complaint. The cakes themselves reminded me of boterkoek, a traditional Dutch recipe that my mom always made. The connection - butter - is obvious. Despite the flavourings, I did enjoy these little cakes. I would probably even make these again, just with different flavourings (lemon and ginger? almond?). Oh, and I halved the recipe and got 16 small cakes.


Modernized Recipe:
(Adapted from American Cookery)

4 EGG YOLKS
2 EGG WHITES
1 pound FLOUR
1/4 pound UNSALTED BUTTER
1 pound SUGAR
2 teaspoons ROSE WATER
A pinch of MACE

1. Preheat oven to 350F. Liberally butter a muffin tin or line a baking sheet with parchment paper.
2. In a large bowl, rub together the sugar, mace, and butter. Add the flour, eggs, and rose water.
3. Take about 2 tablespoons of dough and roll it into a ball. Pat it into a muffin cup or flatten it on the cookie sheet. Bake for 10 - 15 minutes, or until lightly brown. They will be very soft, so do not remove until cooled.


3 comments:

Jack O' Lantern Cakes (1920) ★★★★

Gibson Tally Card, 1925*
Halloween is a great time to have a historically-themed party. There is tons of information out there on how to have a Halloween party, including some pretty unique ideas. A search for "Halloween" on any of the blogs listed to the right will surely yield some great results. You can even provide your trick-or-treaters with a piece of history by giving out candy from this list, which includes ideas from the 1900s to 1960s.

You can also check out blogs or do a Google search and find some pretty neat historical Halloween costumes. Here's some ideas from the 1920s at Vixen Vintage which I just love!

The recipe I'm sharing today comes from a menu in Mrs. Wilson's Cook Book. This cook book is lovely because it includes a lot of menus for special occasions. I've also been impressed by the recipes I've made previously from this book. Many of them look quite tasty.

Original Recipe:
JACK O' LANTERN CAKES
Bake a sponge cake in individual or muffin pans and then ice with chocolate water icing and make the lantern face with white icing.


SPONGE CAKE—ONE EGG
Place in mixing bowl
One-half cup sugar,
Yolk of one egg,
One tablespoon butter.
Cream well, then add
Three tablespoons water,
Two-thirds cup of flour,
One teaspoon baking powder,
Pinch salt.
Beat to mix, then fold in the stiffly beaten white of one egg; bake in well-greased and floured pan in slow oven thirty minutes.


PLAIN WATER ICING
Place in bowl
One pound XXXX sugar.
Two tablespoonfuls cornstarch,
One teaspoonful lemon juice,
Sufficient hot water to spread.
Beat to mix, then use.


CHOCOLATE ICING
Place in bowl
One pound XXXX sugar,
Two tablespoons cornstarch,
One-half cup cocoa,
Sufficient boiling water to make mixture spread.
Beat until smooth, then add one tablespoon of melted butter and use.


The Verdict:
They were okay. I gave four stars because I probably would eat these by choice, but they're really just average. The cake was very thick and kind of unpleasant to chew through because of it. On its own the cake wasn't very nice. It really needs icing or filling to make it tasty. Maybe I'm just a failure at sponge cake, I don't know. The icing was okay, but not great. If I were to make this again, I would make the cakes half the size of a muffin, so that it's not so hard to eat them. The batter also only made four (!) cakes, so, um, yeah...And on the other end of the scale, even half the frosting was waaaay too much. 

Modernized Recipe:
(Adapted from Mrs. Wilson's Cook Book)

1/2 cup SUGAR
1 EGG, separated
1 tablespoon BUTTER
3 tablespoons WATER
2/3 cup FLOUR
1 teaspoon BAKING POWDER
Pinch of SALT

1. Preheat oven to 325F. If not using muffin papers, grease the pan well.
2. In a medium bowl, beat together the sugar, egg yolk, and butter. Beat the egg white separately until stiff peaks form.
3. To the egg yolk batter, add the water, flour, baking powder, and salt. Mix well and gently fold in the beaten egg white.
4. Divide equally into muffin cups and bake until a toothpick comes out clean, about 20 - 25 minutes for full-size muffins or less for smaller ones. Let cool before icing.
5. To make the icing, follow the original recipe (it's easy!), but seriously reduce the amounts...by like halves or quarters.


*I found this image from Sexy Witch. I wanted to find a 1920s representation of a Jack O' Lantern, to make sure I was decorating my cakes accurately!


0 comments: